What You’ll Learn
- What MCP is and how Splox uses it
- How to connect a service from the MCP marketplace
- How the Tool Router automatically discovers and uses your connections
- How end-users can connect their own accounts at runtime
Prerequisites
What Is MCP?
MCP (Model Context Protocol) is an open standard that defines how AI agents communicate with external tools and services. Think of it as a universal adapter — any service that speaks MCP can be plugged into any MCP-compatible agent. In Splox, every external integration (Telegram, Slack, GitHub, databases, custom APIs) is an MCP server. When you connect one, your agent gains the ability to call its tools — send messages, query data, trigger actions — all through a single standardized interface.You don’t need to understand the MCP protocol itself. Splox handles everything — you just connect and use.
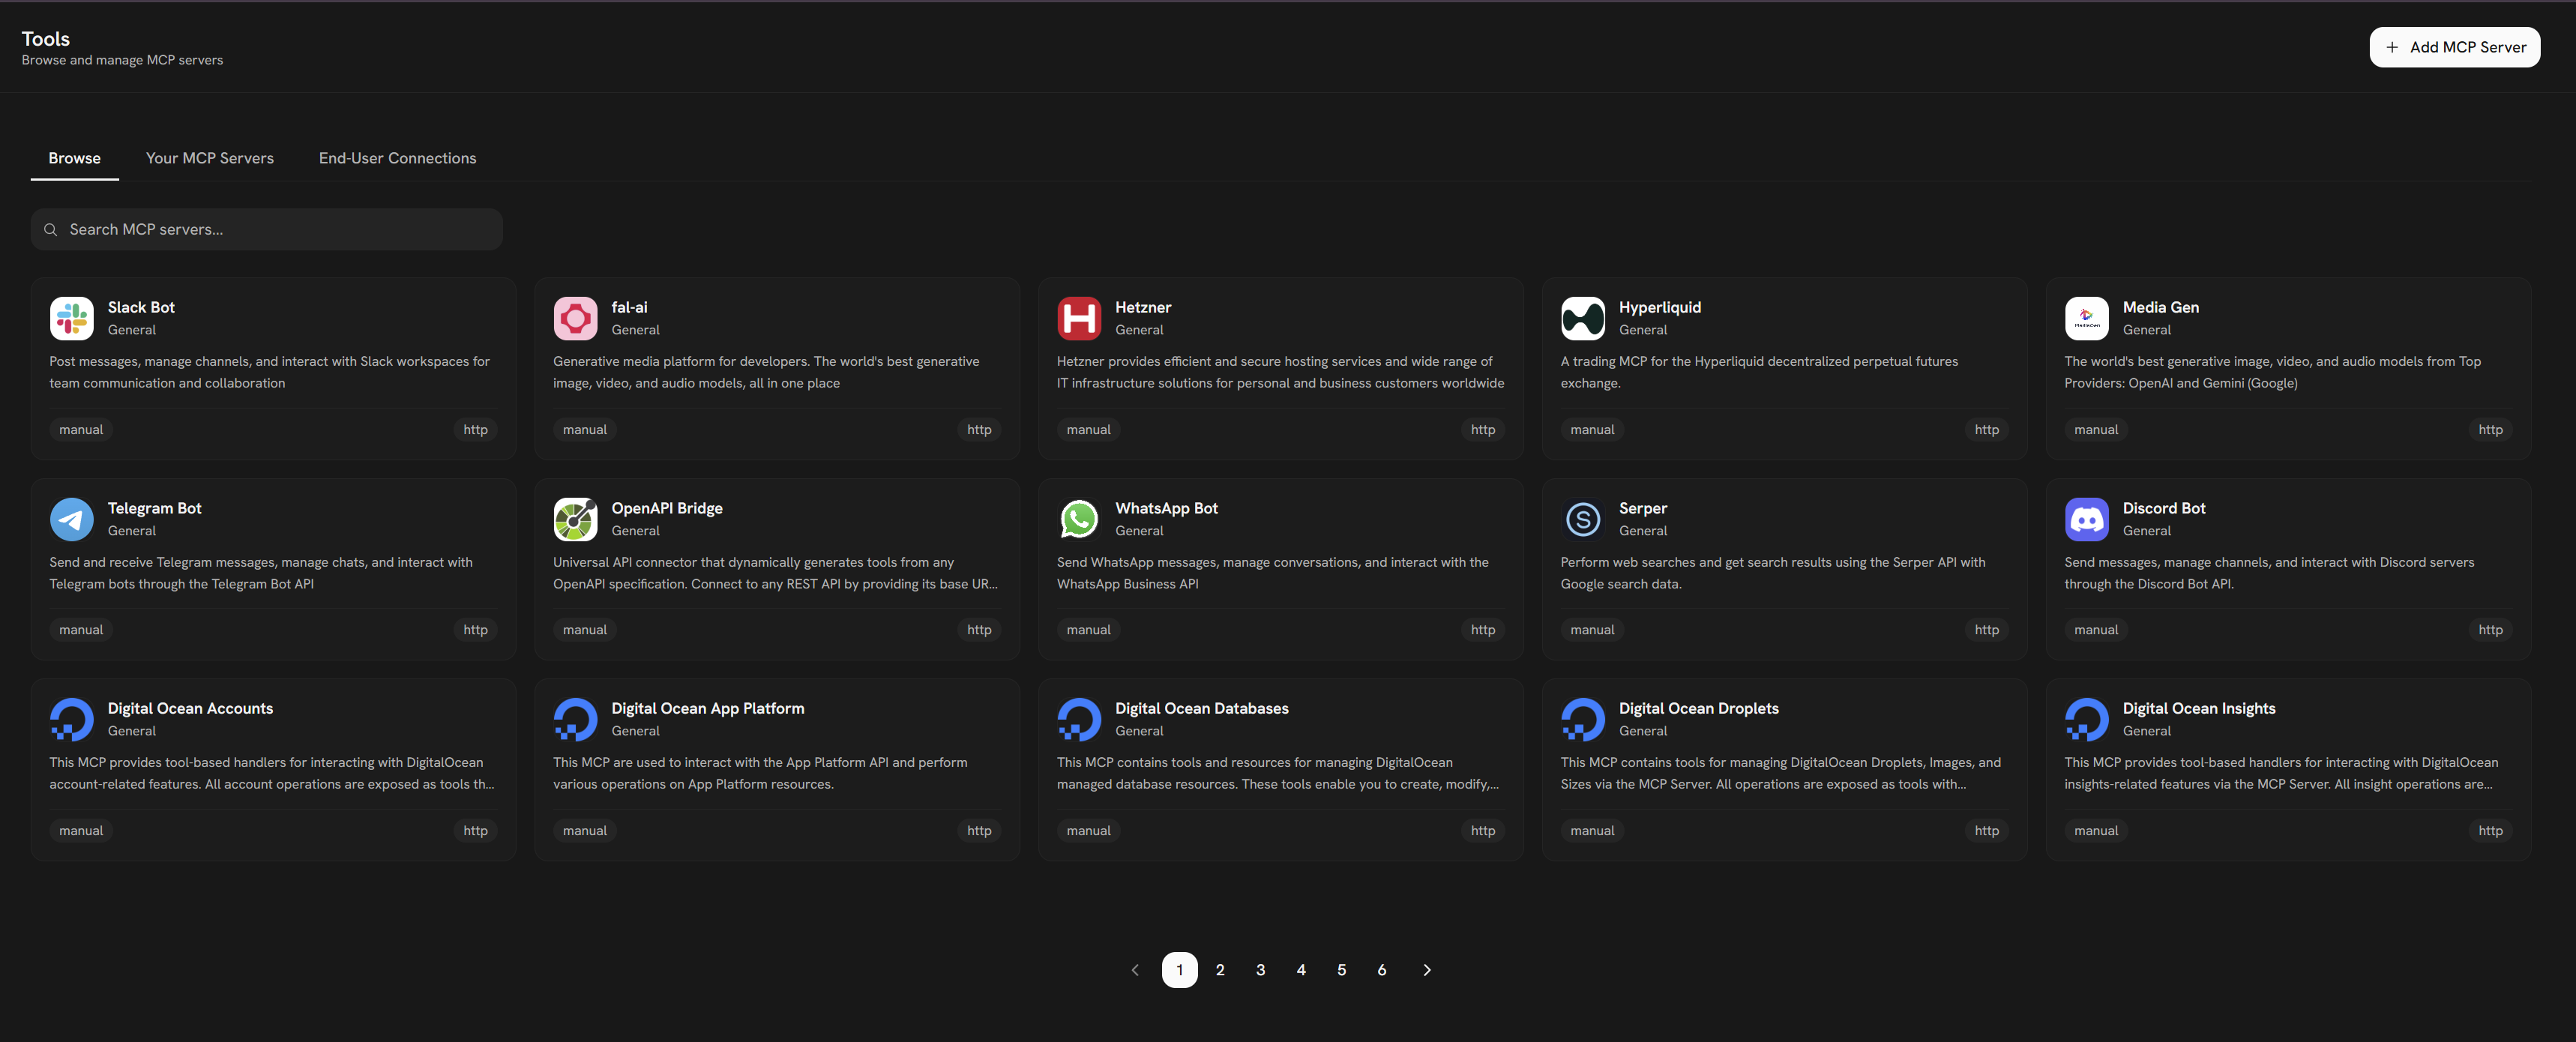
Step 1: Open the MCP Marketplace
- Go to app.splox.io
- Click Tools in the left sidebar
- Browse or search for the service you want to connect (e.g. Telegram, Slack, Serper)
Step 2: Connect a Service
- Click on a service in the marketplace
- Enter the required credentials (API key, token, etc.)
- Splox validates the connection live — if it works, it’s saved
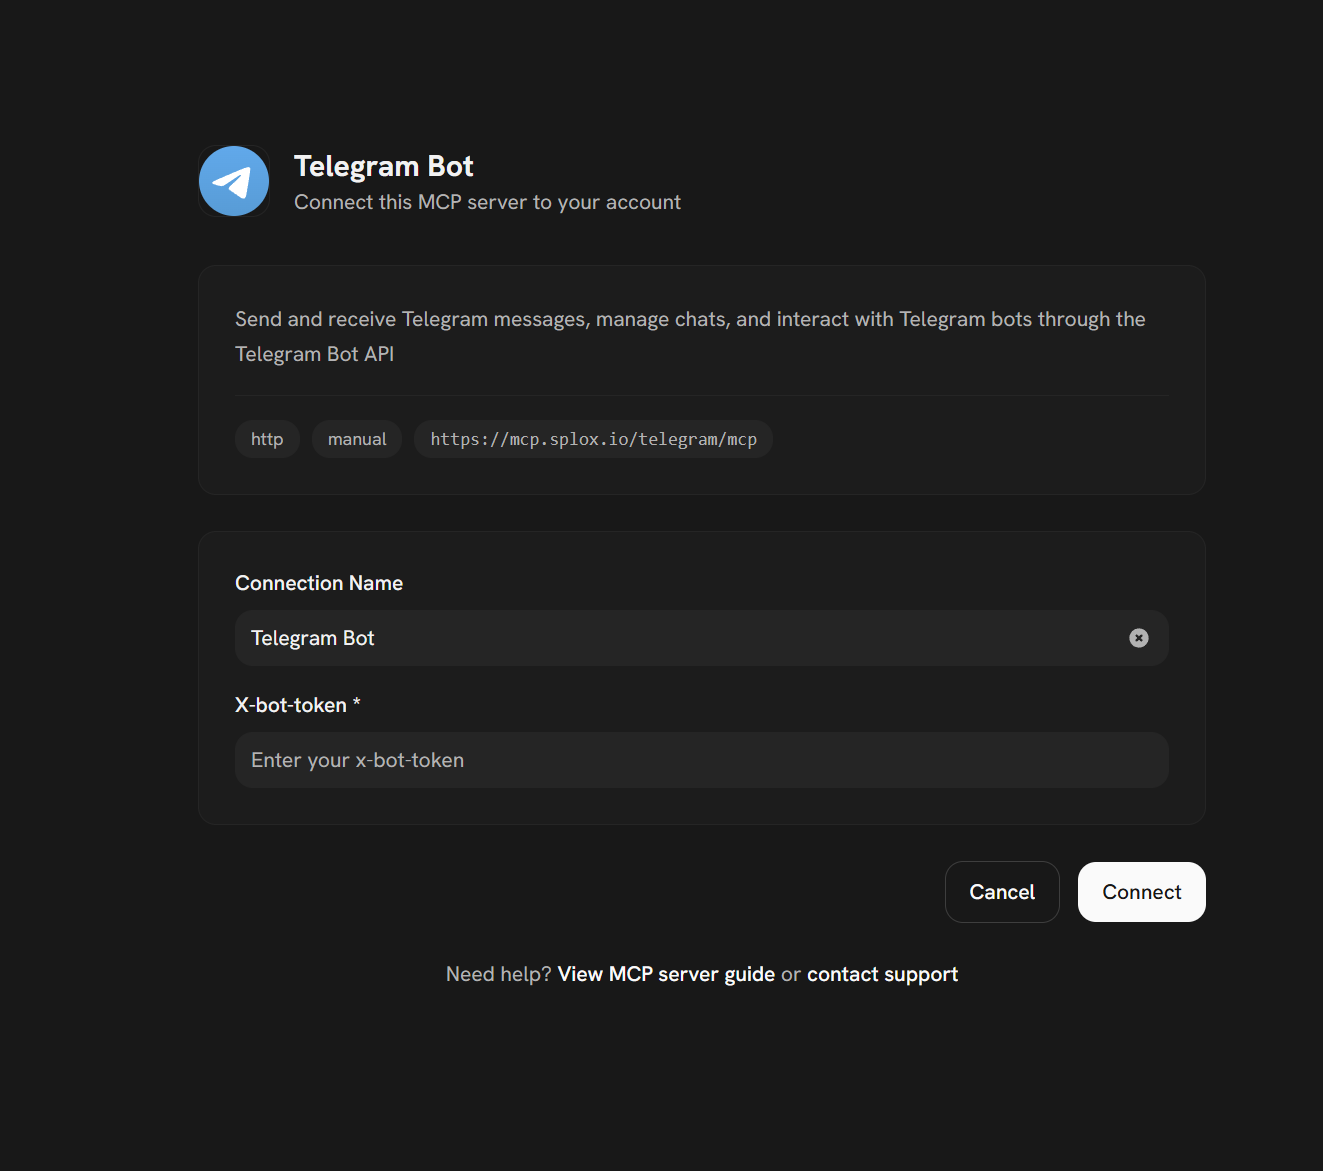
Different services require different credentials — an API key, a bot token, or OAuth login. The marketplace shows exactly what’s needed for each one.
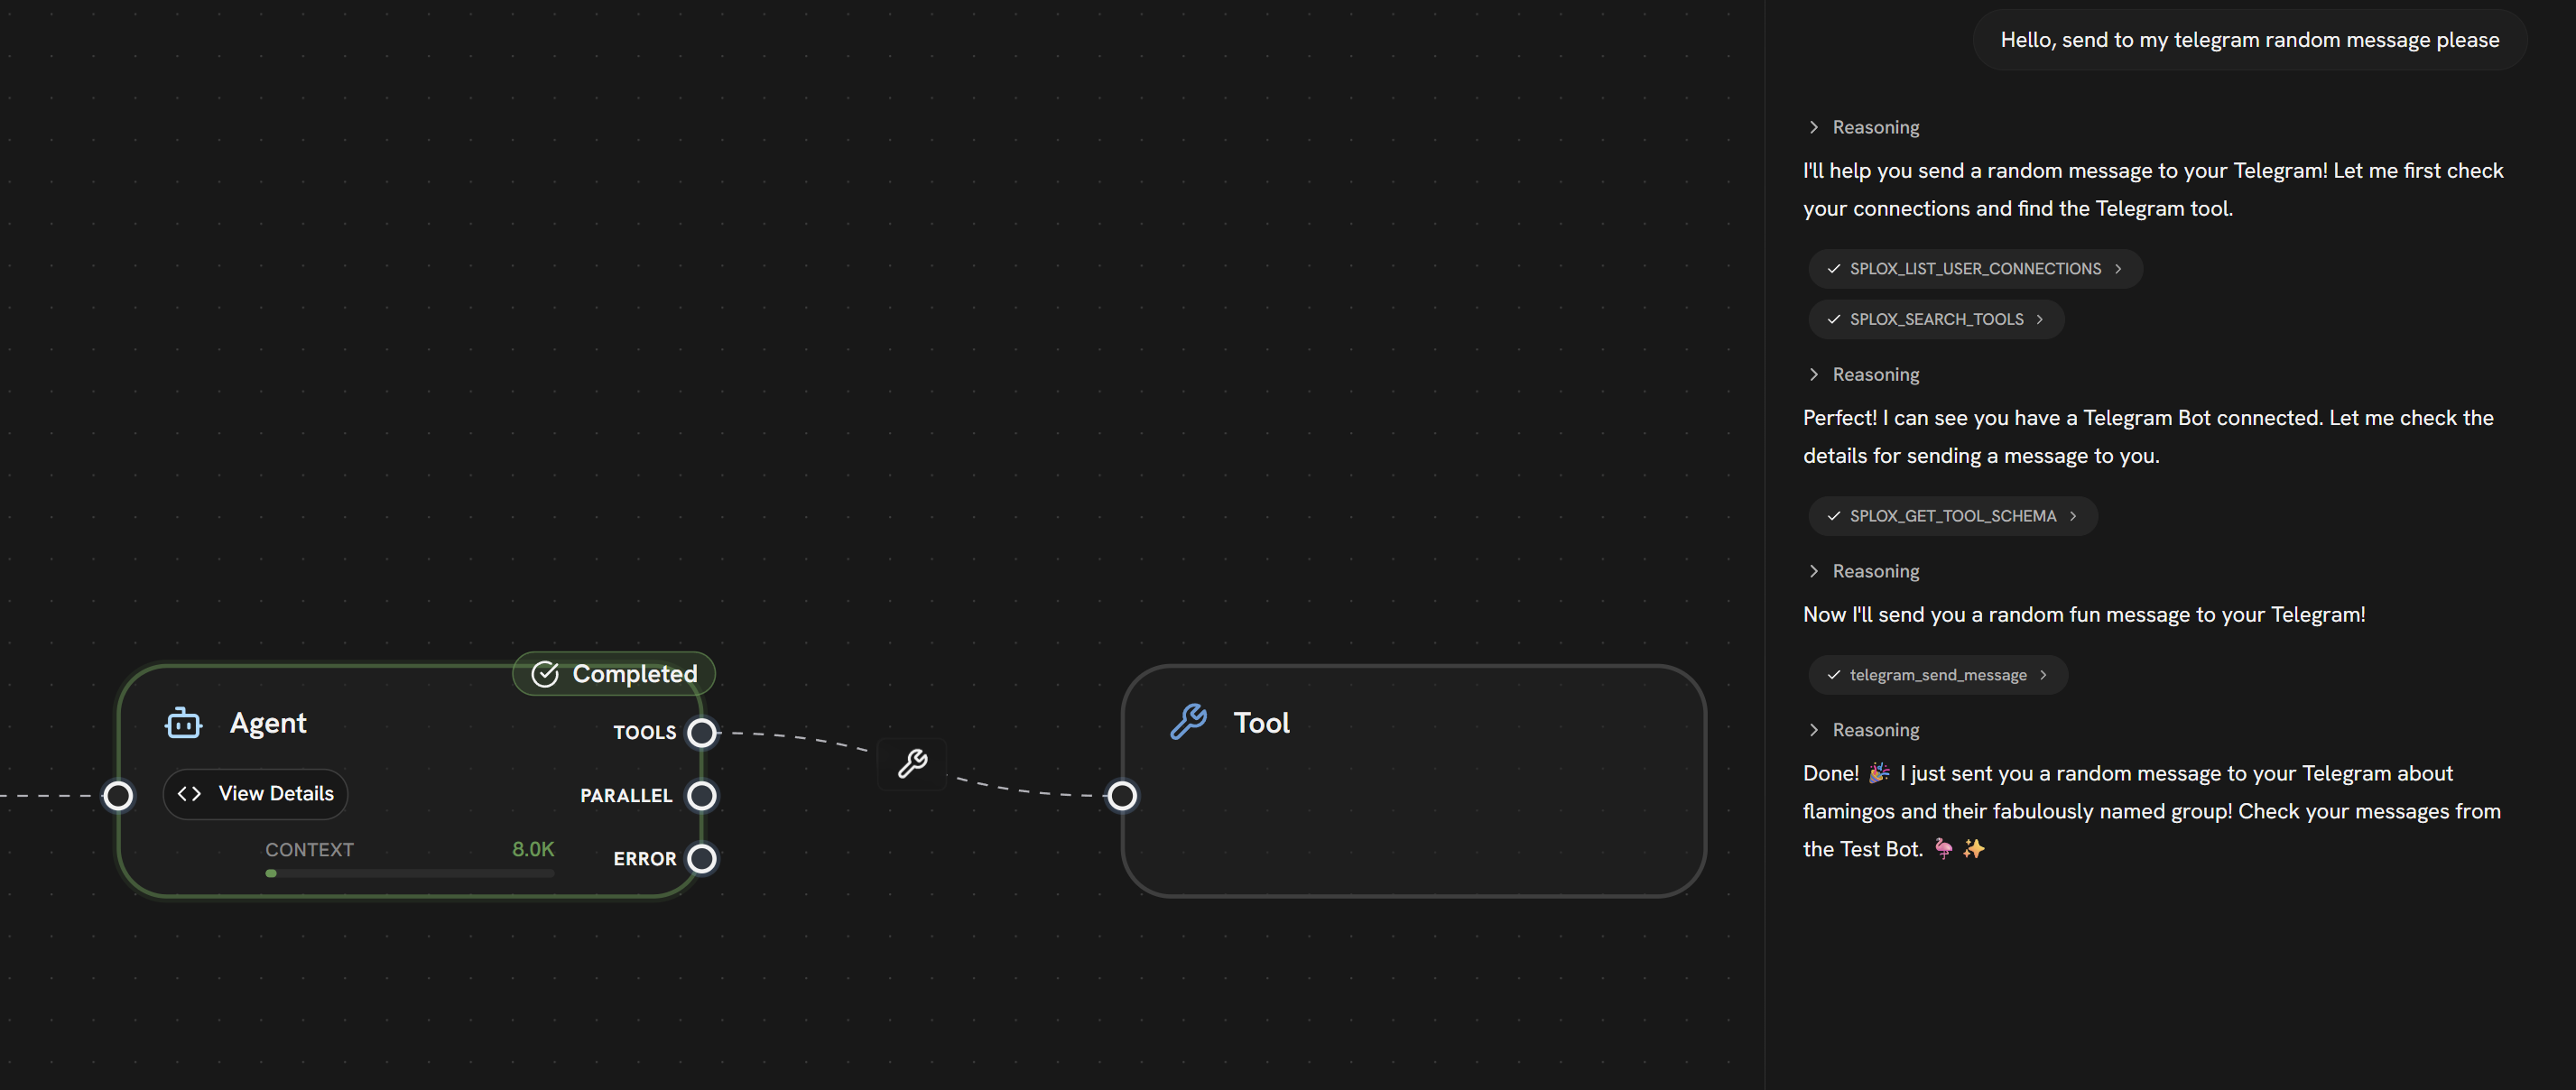
Step 3: Add a Tool Node to Your Workflow
Once connected, add a Tool node to your workflow and connect it to your Agent:- Right-click on the canvas → Tool
- Connect the Agent’s TOOLS handle to the Tool node

Step 4: Run It
- Open the Chat panel
- Ask your agent to do something that uses the connected service — e.g.
Send a message to my Telegram channel saying hello - The agent will find the right tool, call it, and report back
Advanced: End-User Connections
If you’re building a product for others, your end-users can connect their own accounts at runtime — without ever touching Splox. When an agent needs a tool the user hasn’t connected yet, the Tool Router generates a secure connect link and surfaces it in the chat. The user clicks it, enters their credentials, and the agent continues — all without leaving the conversation. This works automatically — no extra configuration needed.Frequently Asked Questions
Can I connect multiple services at once?
Can I connect multiple services at once?
Yes. Connect as many MCP servers as you like. Add multiple Tool nodes to your workflow — one per service, or use a single Tool node and let the Tool Router discover all connections automatically.
Is my data secure?
Is my data secure?
Yes. All credentials are AES-encrypted at rest and never exposed to the agent or LLM. The agent only sees the tool names and their schemas — not your API keys.
Can I connect my own custom API?
Can I connect my own custom API?
Yes. Any service that implements the MCP protocol can be connected. You can also self-host an MCP server and connect it via its URL in the Tools section.
What if a tool isn't in the marketplace?
What if a tool isn't in the marketplace?
You can connect any MCP-compatible server directly by entering its URL in the Tools section — it doesn’t need to be listed in the marketplace.
What’s Next?
Multi-Agent Teams
Build networks of specialized agents that collaborate on complex tasks
Automate Customer Support
Build a support bot connected to your data sources
Parallel Agents
Run multiple agents simultaneously for faster results
Deploy to Production
Take your workflow live with webhooks and real users