> ## Documentation Index
> Fetch the complete documentation index at: https://docs.splox.io/llms.txt
> Use this file to discover all available pages before exploring further.
# Build Your First AI Agent
> Learn how to build an autonomous AI agent in Splox using the workflow builder. Connect an Entry node, Agent node, and Tool node in minutes.
In this tutorial you'll build a fully working AI agent from scratch using the Splox workflow builder. No templates, no shortcuts — just three nodes wired together.
## What You'll Build
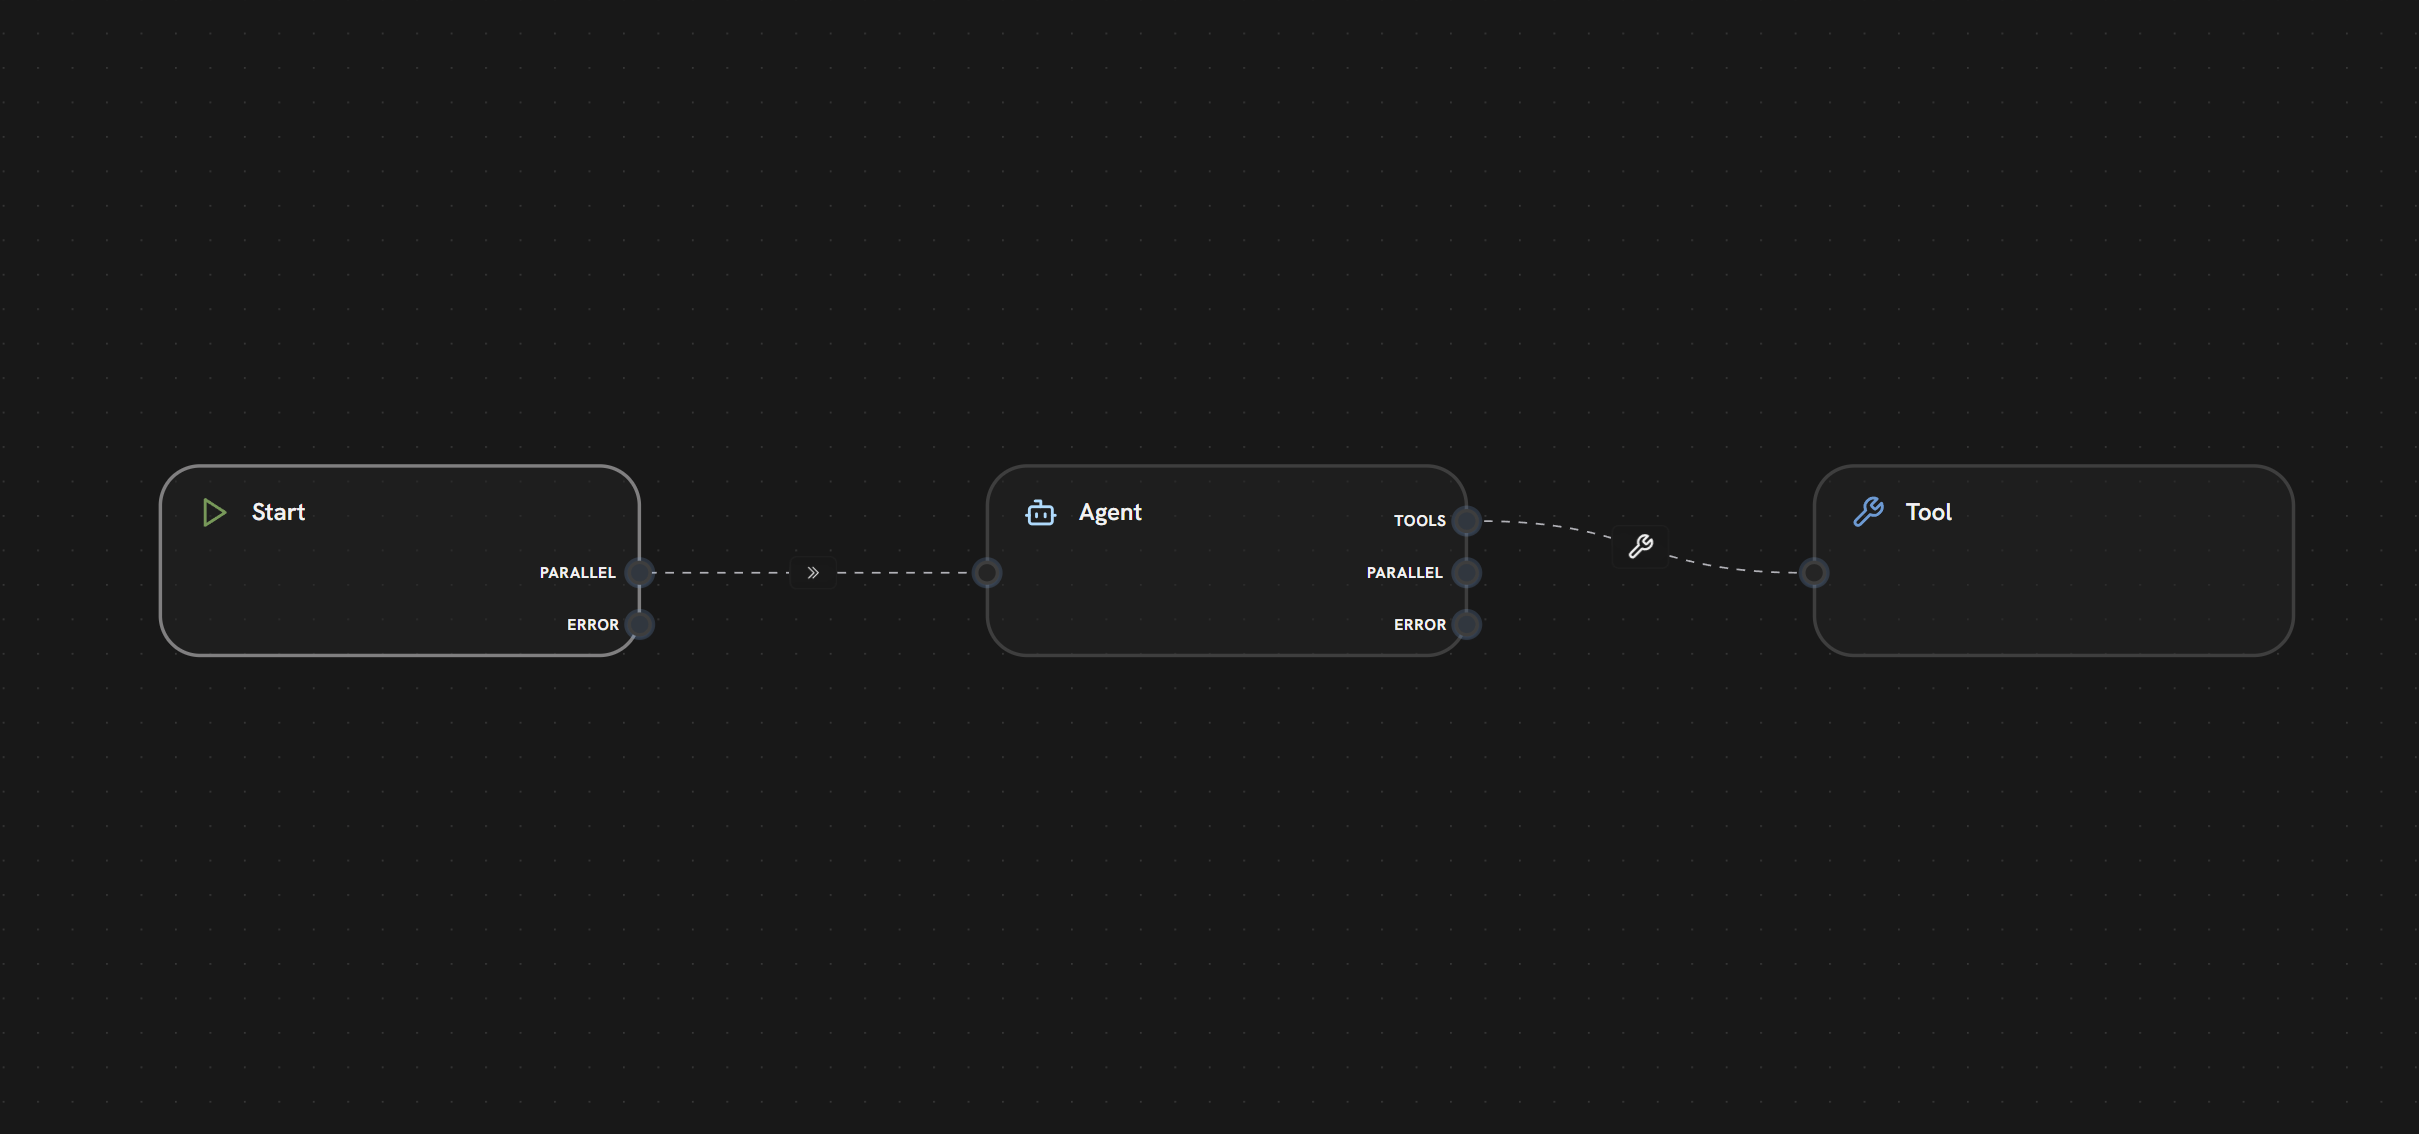
By the end of this tutorial, you'll have an autonomous agent that:
* Receives a user message via the **Start** node
* Thinks and decides what to do via the **Agent** node
* Takes real actions using a connected **Tool** node
**Time to complete:** 5 minutes\
**Skill level:** Beginner
***
## Prerequisites
Before you begin, make sure you have:
* [ ] A [Splox account](https://app.splox.io)
***
## Step 1: Create a New Workflow
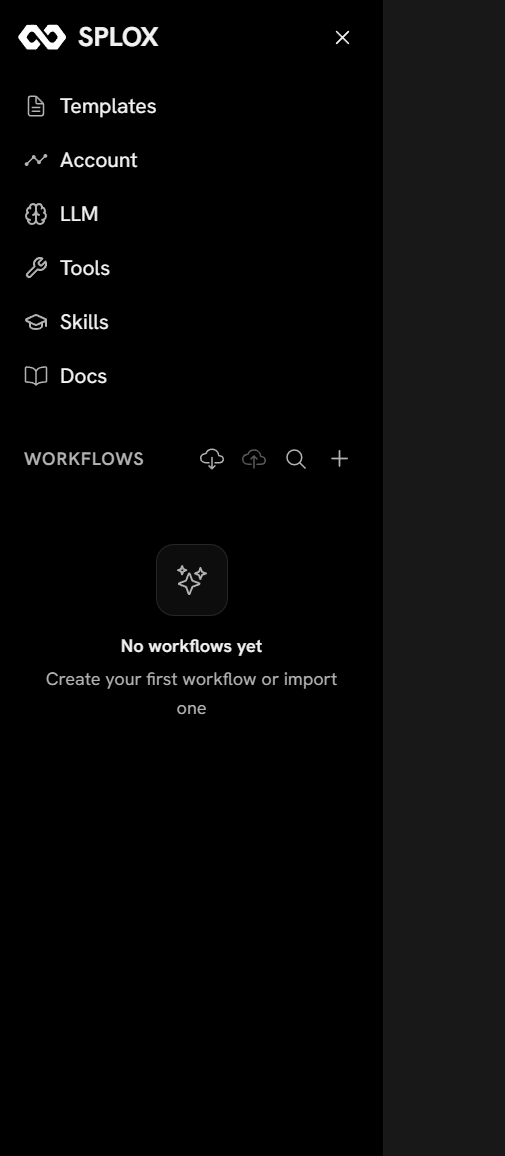
1. Go to [app.splox.io](https://app.splox.io) and open the **Workflows** section
2. Click the **+** button on the left panel
3. Give it a name — e.g. `My First Agent`
4. The workflow canvas opens with an empty graph
***
## Step 2: Add an Entry Node
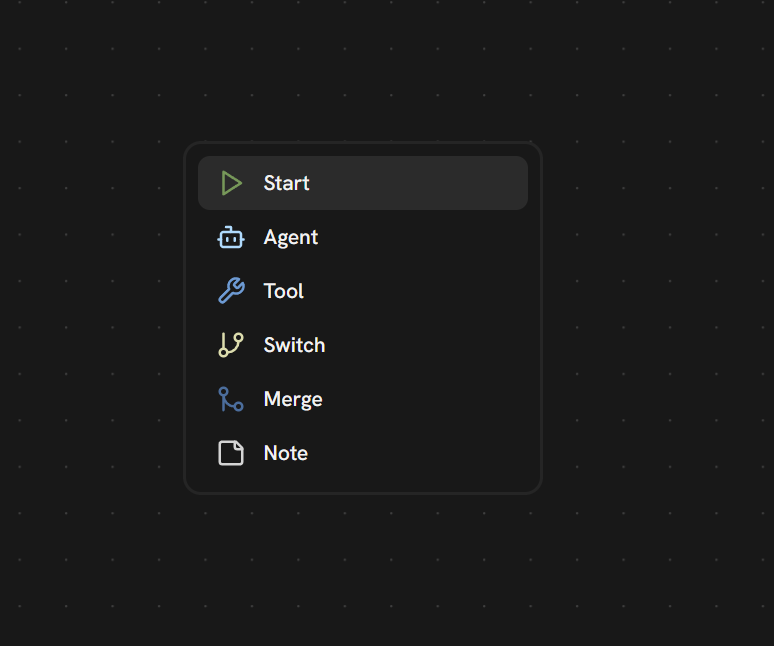
The entry node is the entry point of your workflow.
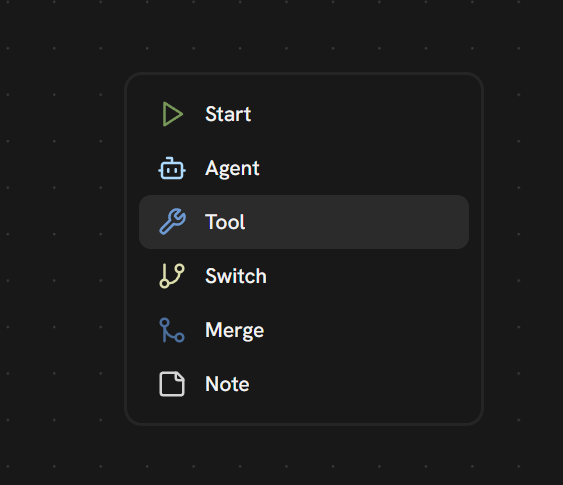
1. Right-click on the canvas → **Start**
Every workflow needs exactly one entry node. It has no configuration — it simply marks where execution begins.
***
## Step 3: Add an Agent Node
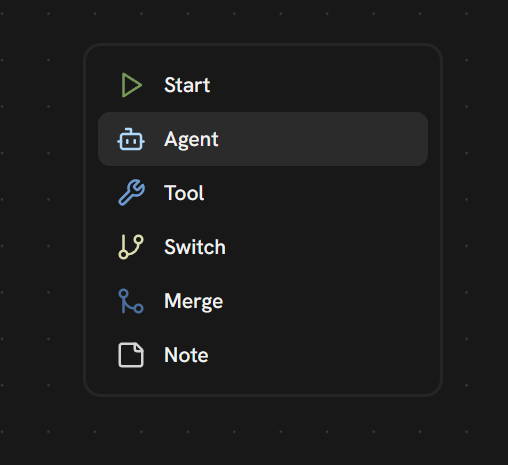
The Agent node is an LLM that reads the input, reasons about it, and decides whether to call a tool or respond directly.
1. Right-click on the canvas → **Agent**
2. In the config panel:
* **Model** — pick any model (e.g. `claude-sonnet-4-5` or `gpt-4o`)
* **System Prompt** — write a short instruction, e.g.:
```
You are a helpful assistant. Use available tools when needed to answer the user's question.
```
***
## Step 4: Add a Tool Node
The Tool node gives your agent access to the **Tool Router** — a smart layer that automatically finds the right tool from the MCP marketplace based on what the agent needs to do.
1. Right-click on the canvas → **Tool**
That's it. The Tool Router handles the rest: when your agent runs and needs a capability (e.g. web search, sending a message), it will find the matching tool from your connected MCP integrations. If you don't have the required connection yet, the agent will surface a link to connect it from the MCP marketplace.
***
## Step 5: Connect Everything
Now wire the nodes together:
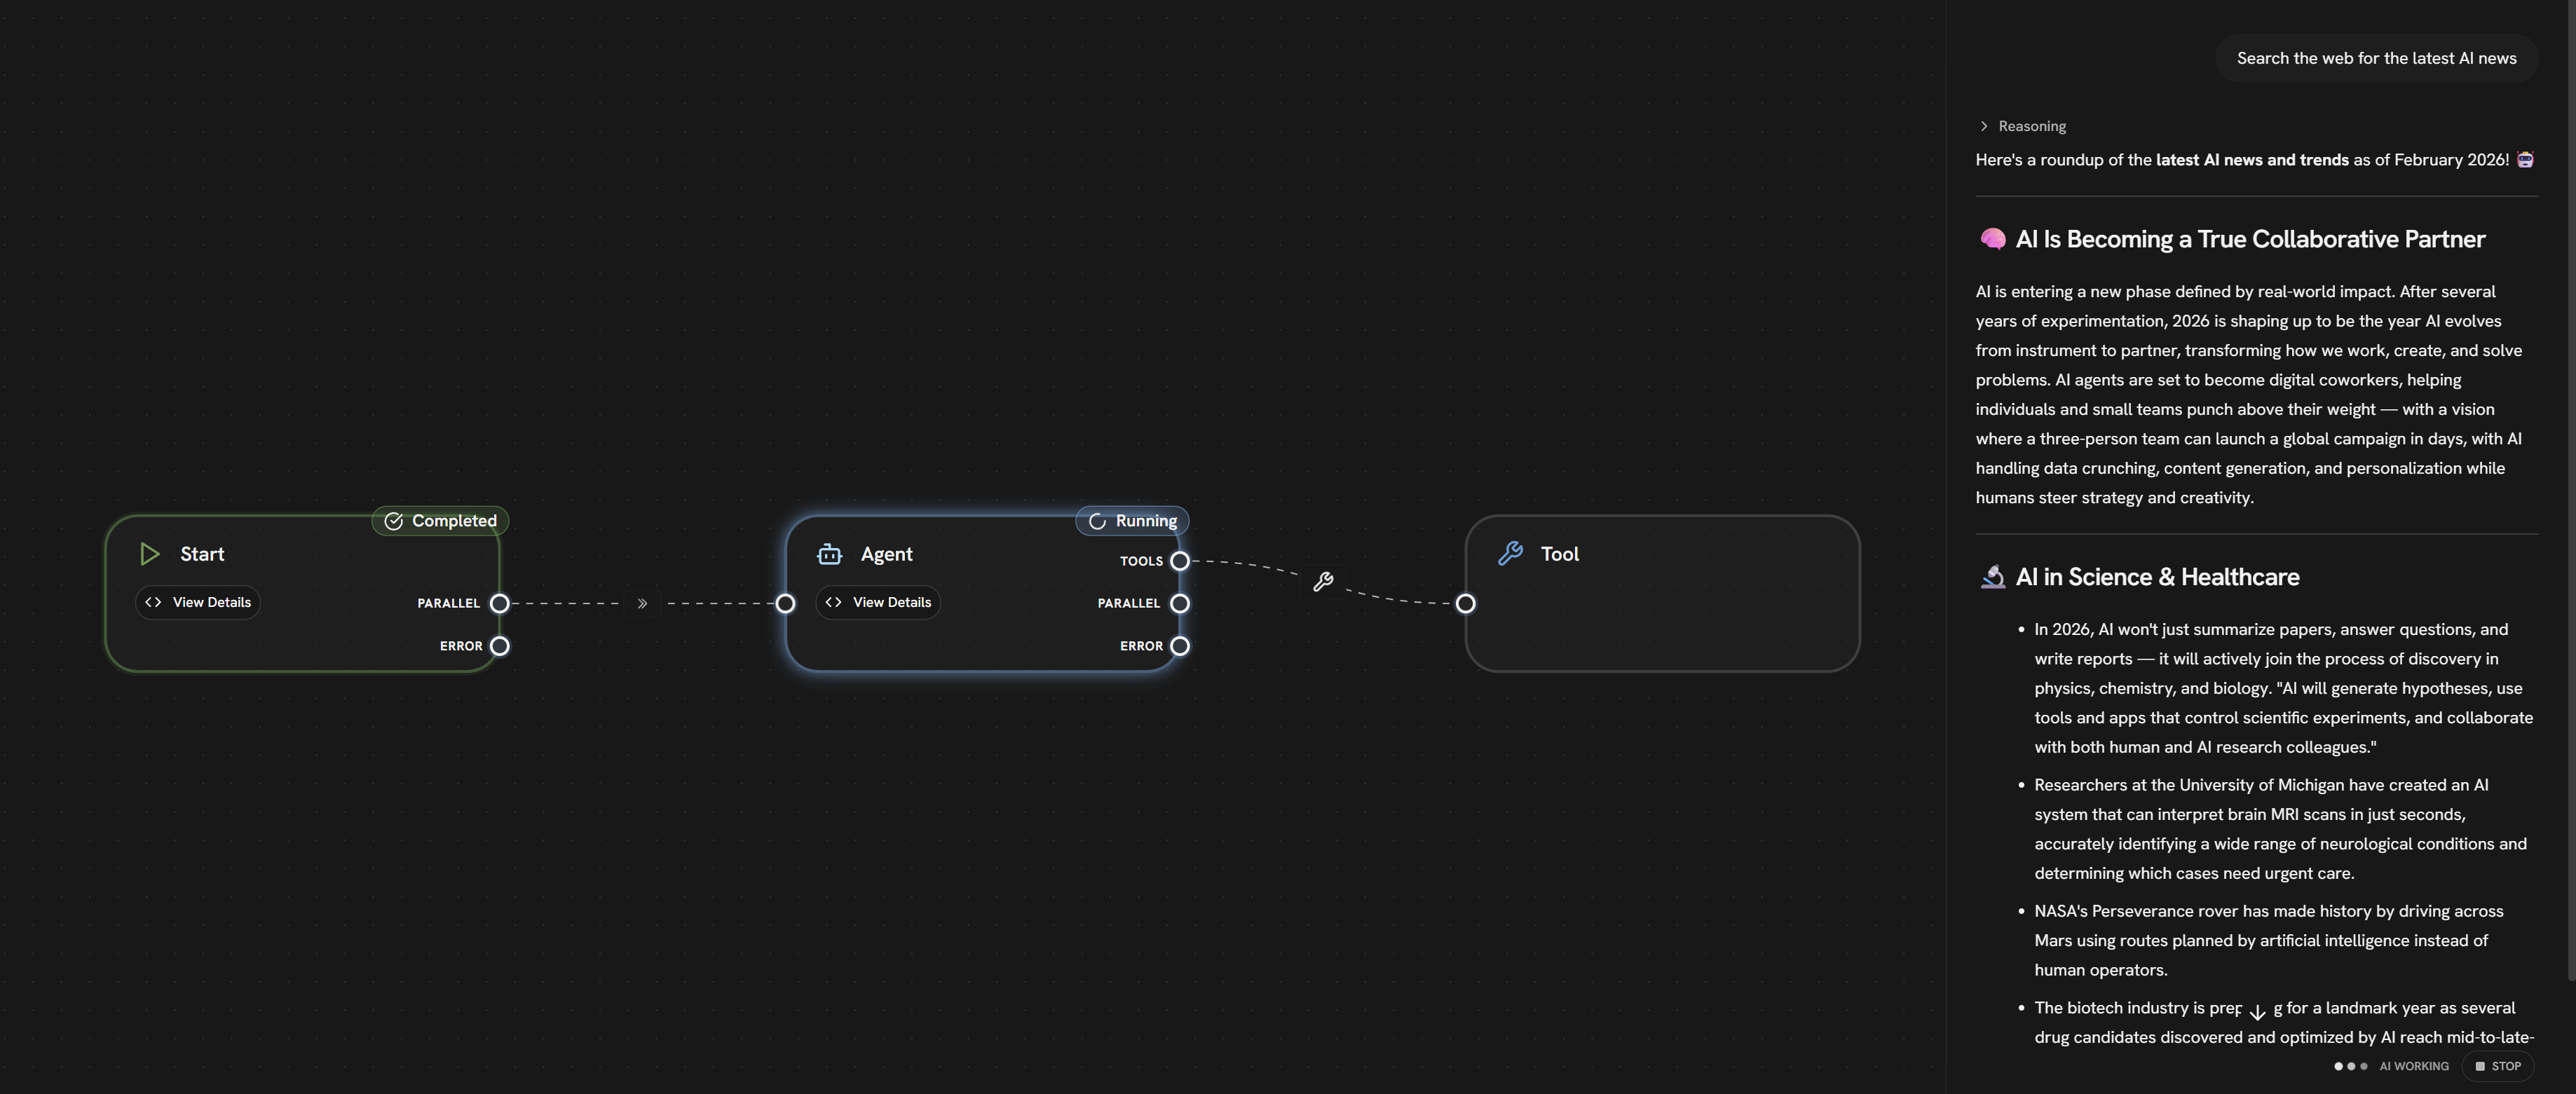
1. **Start → Agent**: drag from the entry node's output handle to the Agent node's input handle
2. **Agent → Tool**: drag from the Agent node's **TOOLS** handle to the Tool node's input handle
Make sure you connect from the **TOOLS** handle (not the PARALLEL handle) on the Agent node. This enables the tool-calling loop so results return back to the Agent.
***
## Step 6: Run It
1. Open the **Chat** panel (bottom toolbar → chat icon)
2. Type a message, e.g. `Search the web for the latest AI news`
3. Hit **Enter** — your agent will call the tool, get the result, and respond
***
## Advanced: Configuring Your Agent
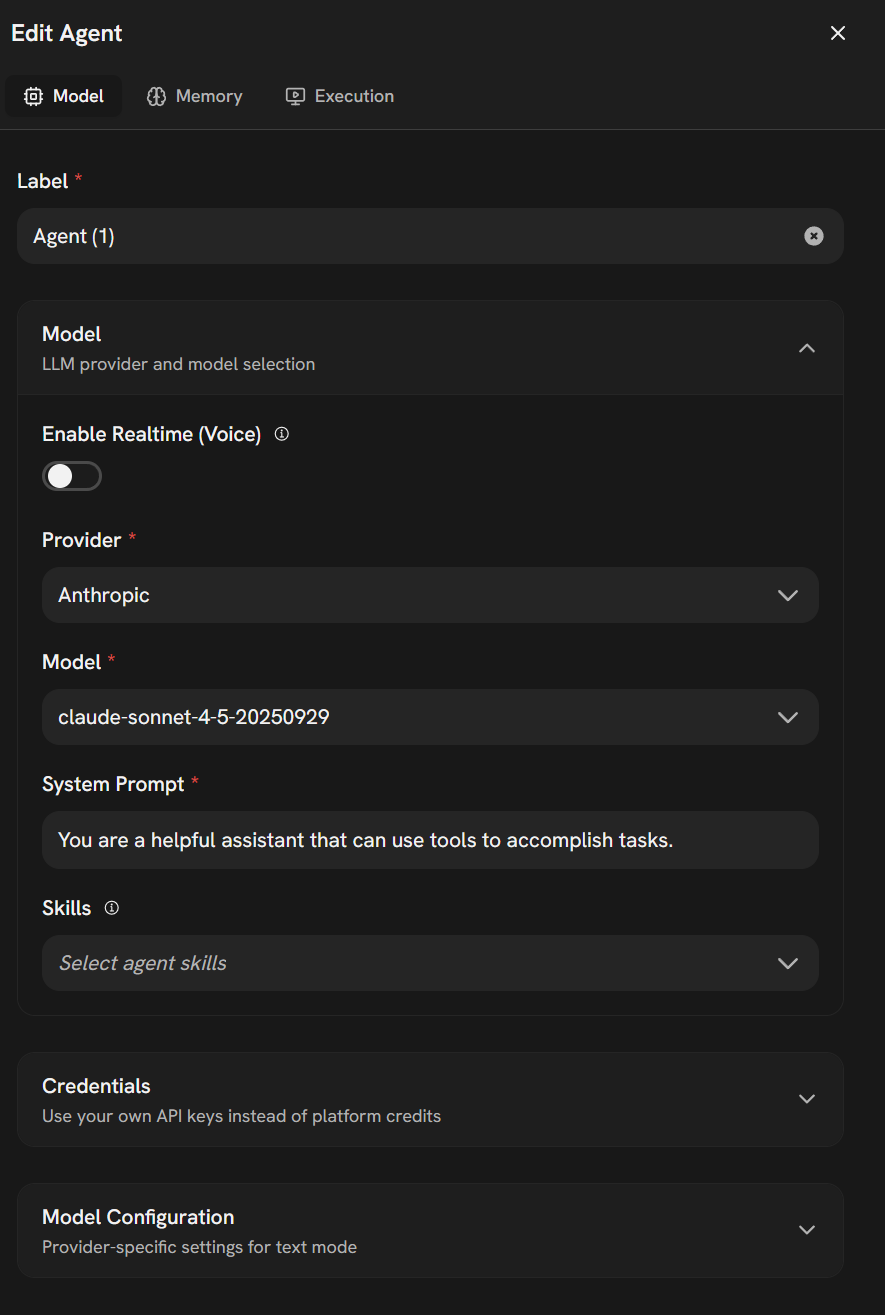
Click on any node to open its configuration panel. The Agent node has three tabs:
**Model tab**
| Setting | Description |
| --------------------------- | ------------------------------------------------------------------------ |
| **Label** | Rename the node |
| **Provider / Model** | Switch between LLM providers and models (e.g. Anthropic, OpenAI, Gemini) |
| **System Prompt** | Instructions that define your agent's behavior and persona |
| **Skills** | Attach reusable skill sets to your agent |
| **Credentials** | Use your own API keys instead of platform credits |
| **Enable Realtime (Voice)** | Switch to voice/realtime mode |
**Memory tab** — configure context window limits, trim strategy, summarization, and more.
**Execution tab** — set max iterations, tool choice, streaming, and other runtime settings.
***
## Frequently Asked Questions
When an LLM calls a tool, it needs to receive the result back to continue reasoning. The TOOLS edge creates this loop — the Agent calls the Tool, gets the result, and then decides what to do next (call another tool or respond to the user).
Yes. Add more Tool nodes and connect them all to the Agent's TOOLS handle. The agent will automatically know about all connected tools and choose the right one based on context.
The **TOOLS** handle is used for tool-calling loops — results return to the Agent. The **PARALLEL** handle is for regular sequential flow where the Agent's output passes to the next node without looping back.
***
## Next Steps
* **Memory** — the Agent node is always multi-turn by default. Open the node config to tune memory settings: limit type (messages or tokens), max messages/tokens, trim strategy, summarization, and more.
* **Add more tools** — connect multiple Tool nodes to give your agent more capabilities
* **Go parallel** — check out [Parallel Agents](/tutorials/parallel-agents) to run multiple agents simultaneously
* **Build multi-agent systems** — explore [Multi-Agent Teams](/tutorials/multi-agent-team)
* **Join the community** — share your builds at [community.splox.io](https://community.splox.io) or [Telegram](https://t.me/splox_ai)
 By the end of this tutorial, you'll have an autonomous agent that:
* Receives a user message via the **Start** node
* Thinks and decides what to do via the **Agent** node
* Takes real actions using a connected **Tool** node
**Time to complete:** 5 minutes\
**Skill level:** Beginner
***
## Prerequisites
Before you begin, make sure you have:
* [ ] A [Splox account](https://app.splox.io)
***
## Step 1: Create a New Workflow
1. Go to [app.splox.io](https://app.splox.io) and open the **Workflows** section
2. Click the **+** button on the left panel
3. Give it a name — e.g. `My First Agent`
4. The workflow canvas opens with an empty graph
By the end of this tutorial, you'll have an autonomous agent that:
* Receives a user message via the **Start** node
* Thinks and decides what to do via the **Agent** node
* Takes real actions using a connected **Tool** node
**Time to complete:** 5 minutes\
**Skill level:** Beginner
***
## Prerequisites
Before you begin, make sure you have:
* [ ] A [Splox account](https://app.splox.io)
***
## Step 1: Create a New Workflow
1. Go to [app.splox.io](https://app.splox.io) and open the **Workflows** section
2. Click the **+** button on the left panel
3. Give it a name — e.g. `My First Agent`
4. The workflow canvas opens with an empty graph
 ***
## Step 2: Add an Entry Node
The entry node is the entry point of your workflow.
1. Right-click on the canvas → **Start**
***
## Step 2: Add an Entry Node
The entry node is the entry point of your workflow.
1. Right-click on the canvas → **Start**
 ***
## Step 4: Add a Tool Node
The Tool node gives your agent access to the **Tool Router** — a smart layer that automatically finds the right tool from the MCP marketplace based on what the agent needs to do.
1. Right-click on the canvas → **Tool**
That's it. The Tool Router handles the rest: when your agent runs and needs a capability (e.g. web search, sending a message), it will find the matching tool from your connected MCP integrations. If you don't have the required connection yet, the agent will surface a link to connect it from the MCP marketplace.
***
## Step 4: Add a Tool Node
The Tool node gives your agent access to the **Tool Router** — a smart layer that automatically finds the right tool from the MCP marketplace based on what the agent needs to do.
1. Right-click on the canvas → **Tool**
That's it. The Tool Router handles the rest: when your agent runs and needs a capability (e.g. web search, sending a message), it will find the matching tool from your connected MCP integrations. If you don't have the required connection yet, the agent will surface a link to connect it from the MCP marketplace.
 ***
## Step 5: Connect Everything
Now wire the nodes together:
1. **Start → Agent**: drag from the entry node's output handle to the Agent node's input handle
2. **Agent → Tool**: drag from the Agent node's **TOOLS** handle to the Tool node's input handle
***
## Step 5: Connect Everything
Now wire the nodes together:
1. **Start → Agent**: drag from the entry node's output handle to the Agent node's input handle
2. **Agent → Tool**: drag from the Agent node's **TOOLS** handle to the Tool node's input handle
 ***
## Advanced: Configuring Your Agent
Click on any node to open its configuration panel. The Agent node has three tabs:
**Model tab**
| Setting | Description |
| --------------------------- | ------------------------------------------------------------------------ |
| **Label** | Rename the node |
| **Provider / Model** | Switch between LLM providers and models (e.g. Anthropic, OpenAI, Gemini) |
| **System Prompt** | Instructions that define your agent's behavior and persona |
| **Skills** | Attach reusable skill sets to your agent |
| **Credentials** | Use your own API keys instead of platform credits |
| **Enable Realtime (Voice)** | Switch to voice/realtime mode |
**Memory tab** — configure context window limits, trim strategy, summarization, and more.
**Execution tab** — set max iterations, tool choice, streaming, and other runtime settings.
***
## Advanced: Configuring Your Agent
Click on any node to open its configuration panel. The Agent node has three tabs:
**Model tab**
| Setting | Description |
| --------------------------- | ------------------------------------------------------------------------ |
| **Label** | Rename the node |
| **Provider / Model** | Switch between LLM providers and models (e.g. Anthropic, OpenAI, Gemini) |
| **System Prompt** | Instructions that define your agent's behavior and persona |
| **Skills** | Attach reusable skill sets to your agent |
| **Credentials** | Use your own API keys instead of platform credits |
| **Enable Realtime (Voice)** | Switch to voice/realtime mode |
**Memory tab** — configure context window limits, trim strategy, summarization, and more.
**Execution tab** — set max iterations, tool choice, streaming, and other runtime settings.
 ***
## Frequently Asked Questions
***
## Frequently Asked Questions