> ## Documentation Index
> Fetch the complete documentation index at: https://docs.splox.io/llms.txt
> Use this file to discover all available pages before exploring further.
# Connect AI to Your Data Sources
> Learn how to connect external services, APIs, and data sources to your Splox agents using MCP (Model Context Protocol).
Out of the box, your agent can reason and respond — but to take real actions in the world, it needs to connect to external services. In Splox, this is done through **MCP (Model Context Protocol)**: a universal standard for plugging any API, database, or service into your AI agent.
## What You'll Learn
* What MCP is and how Splox uses it
* How to connect a service from the MCP marketplace
* How the Tool Router automatically discovers and uses your connections
* How end-users can connect their own accounts at runtime
## Prerequisites
* [ ] A [Splox account](https://app.splox.io)
* [ ] Completed [Build Your First AI Agent](/tutorials/first-ai-agent)
***
## What Is MCP?
MCP (Model Context Protocol) is an open standard that defines how AI agents communicate with external tools and services. Think of it as a universal adapter — any service that speaks MCP can be plugged into any MCP-compatible agent.
In Splox, every external integration (Telegram, Slack, GitHub, databases, custom APIs) is an MCP server. When you connect one, your agent gains the ability to call its tools — send messages, query data, trigger actions — all through a single standardized interface.
You don't need to understand the MCP protocol itself. Splox handles everything — you just connect and use.
***
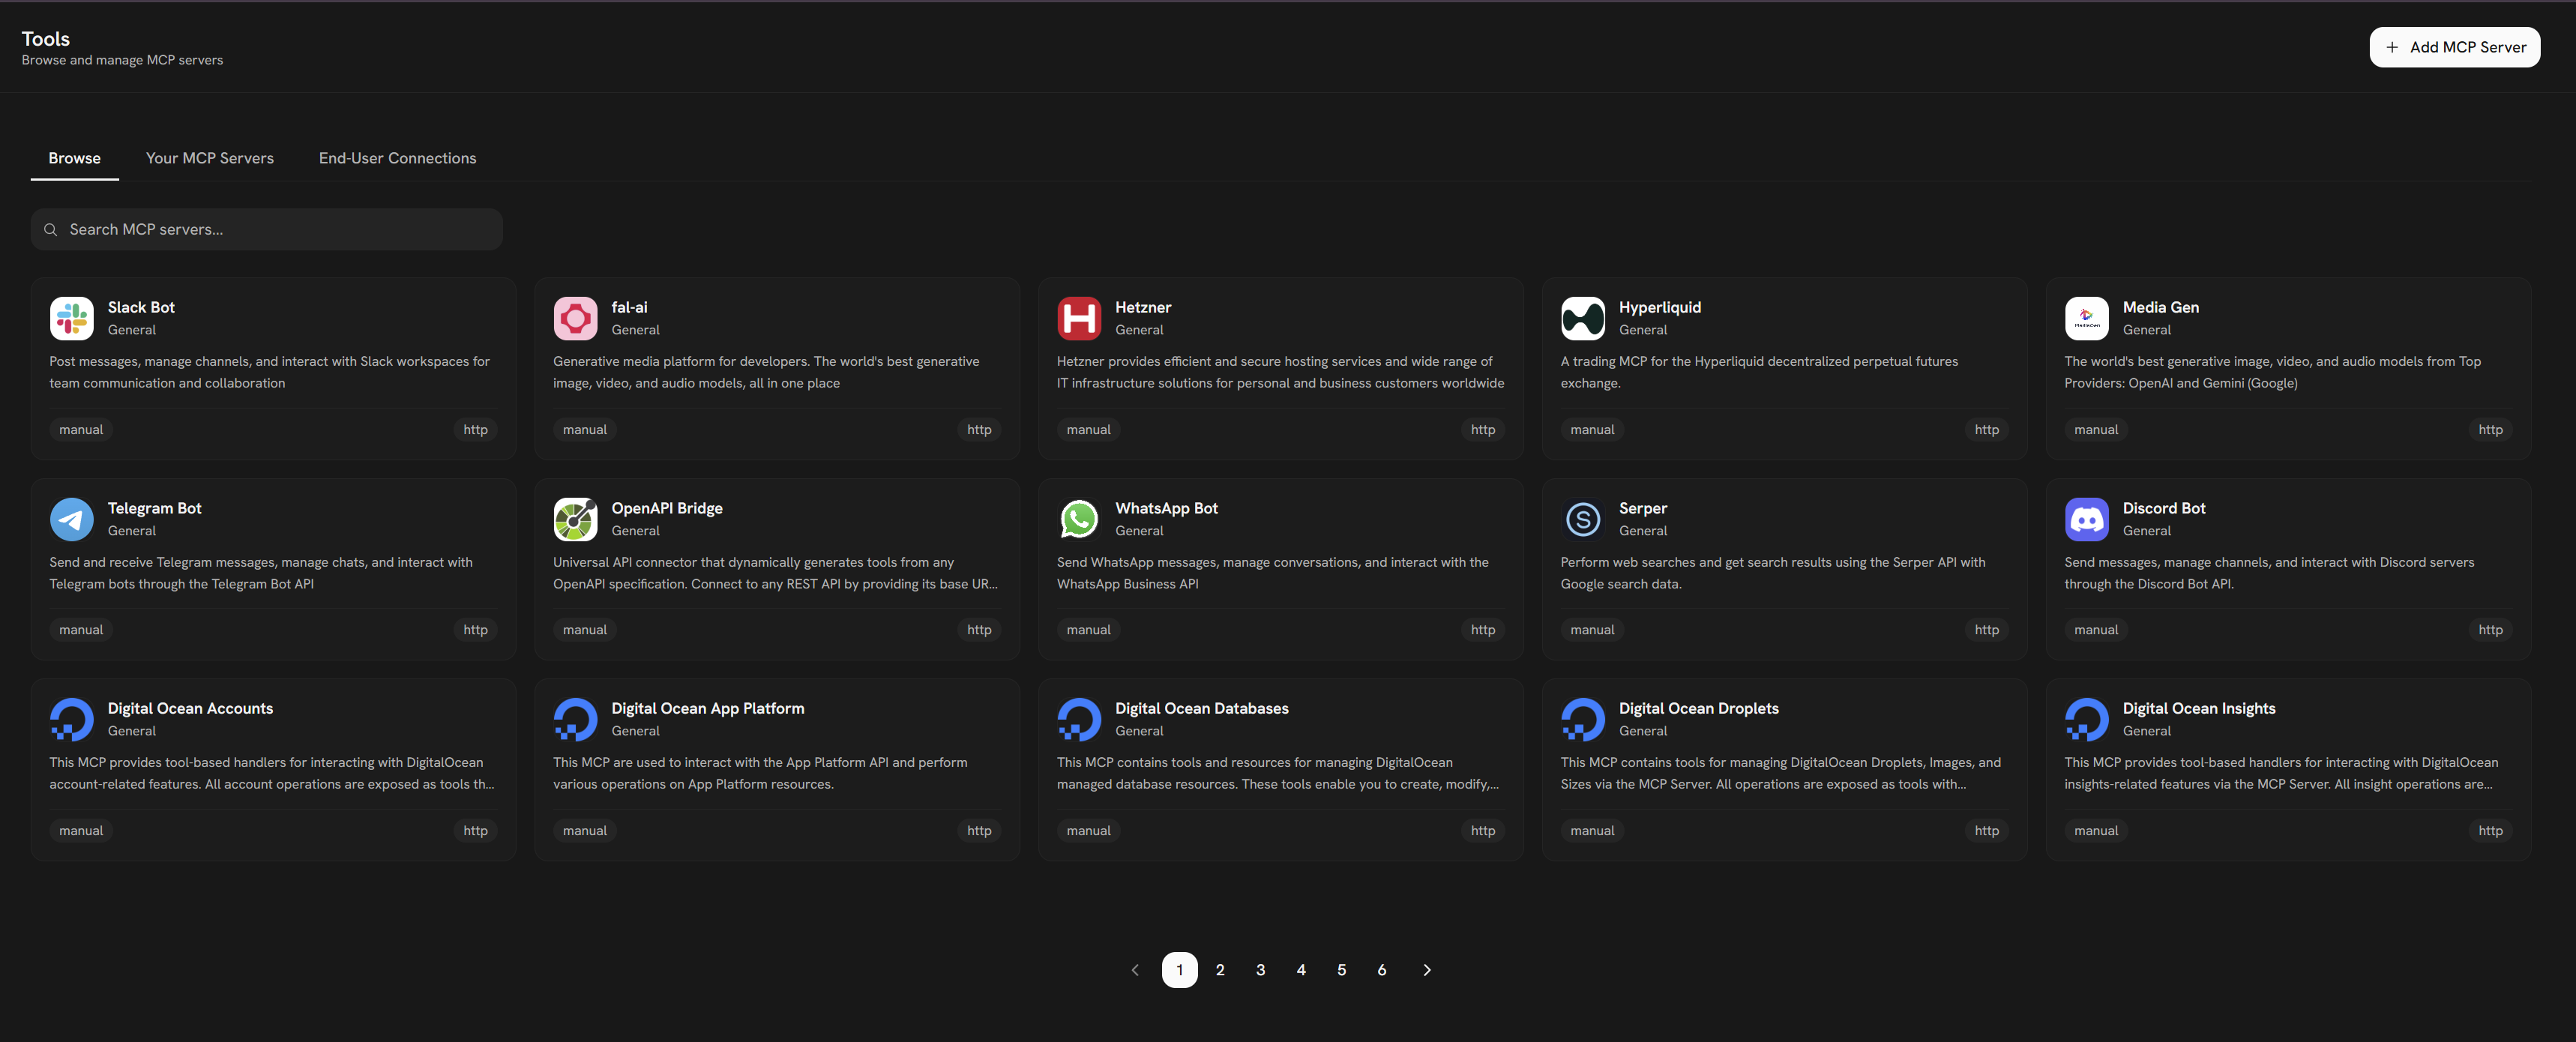
## Step 1: Open the MCP Marketplace
1. Go to [app.splox.io](https://app.splox.io)
2. Click **Tools** in the left sidebar
3. Browse or search for the service you want to connect (e.g. Telegram, Slack, Serper)
***
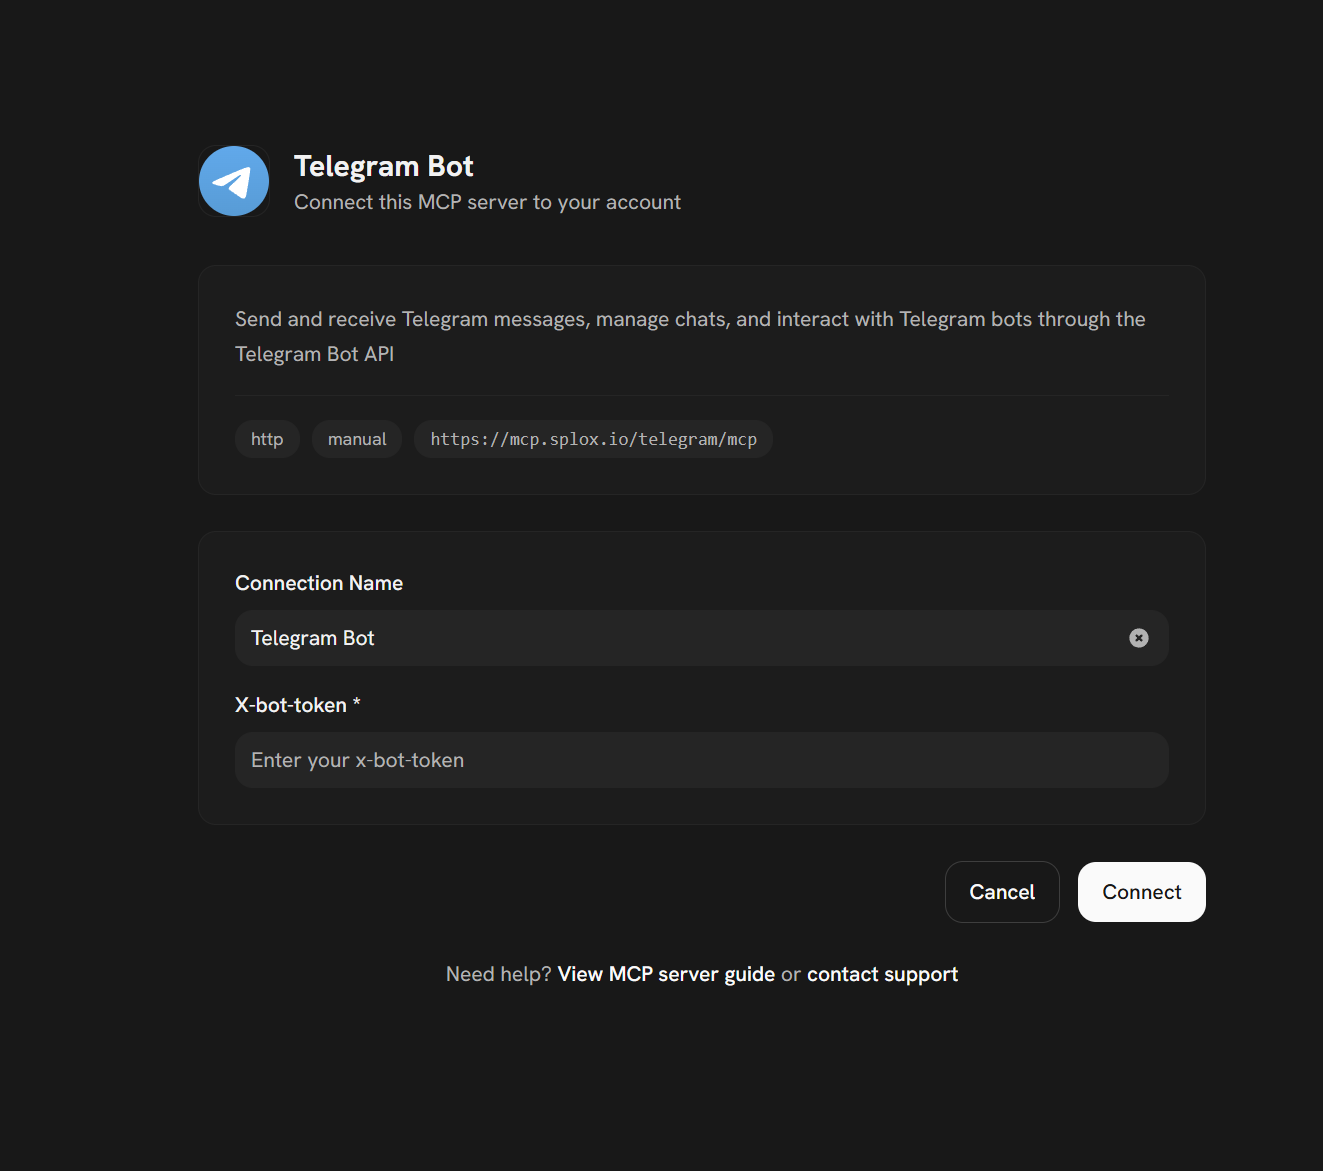
## Step 2: Connect a Service
1. Click on a service in the marketplace
2. Enter the required credentials (API key, token, etc.)
3. Splox validates the connection live — if it works, it's saved
Your connection is now stored securely (AES-encrypted) and available to any workflow you build.
Different services require different credentials — an API key, a bot token, or OAuth login. The marketplace shows exactly what's needed for each one.
***
## Step 3: Add a Tool Node to Your Workflow
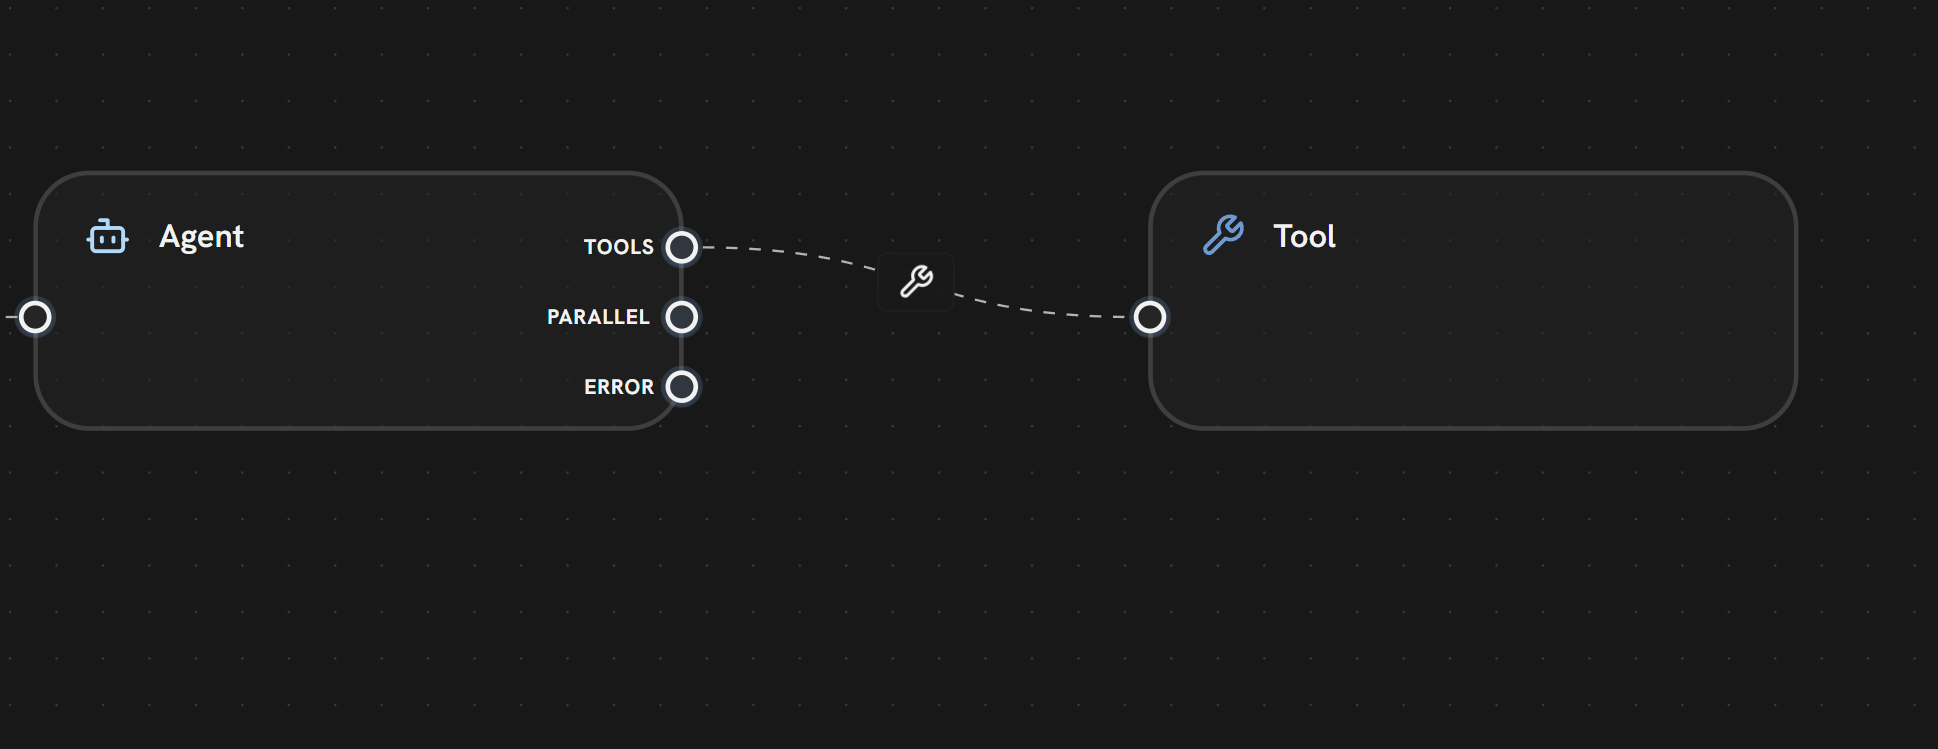
Once connected, add a **Tool** node to your workflow and connect it to your Agent:
1. Right-click on the canvas → **Tool**
2. Connect the Agent's **TOOLS** handle to the Tool node
That's it. The **Tool Router** automatically discovers all your connected MCP servers and their tools. When your agent needs to take an action, it searches your connections, finds the right tool, and calls it.
***
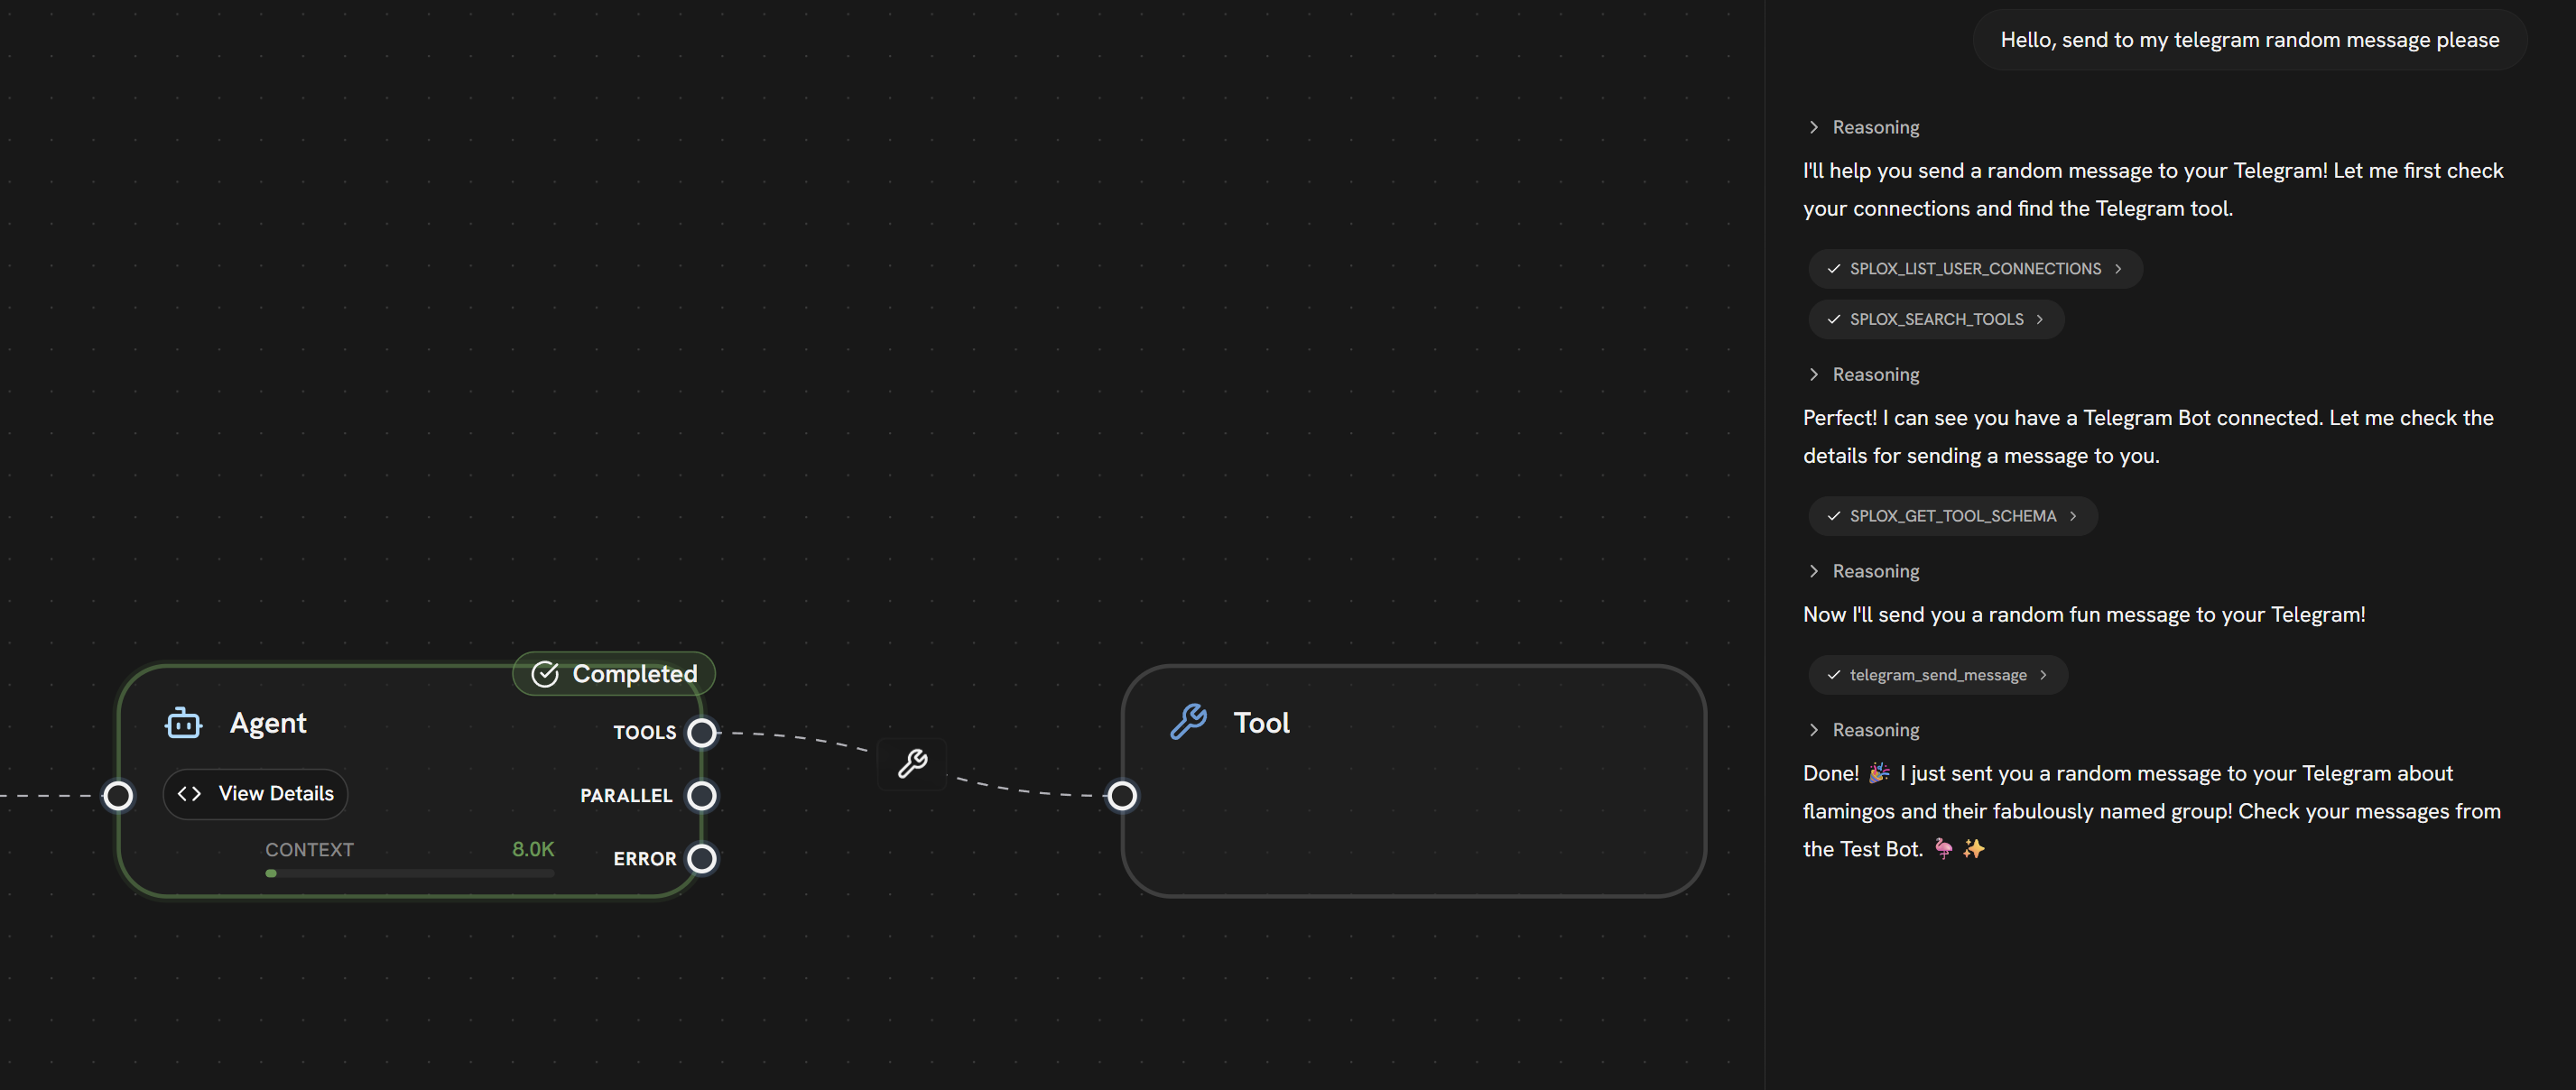
## Step 4: Run It
1. Open the **Chat** panel
2. Ask your agent to do something that uses the connected service — e.g. `Send a message to my Telegram channel saying hello`
3. The agent will find the right tool, call it, and report back
***
## Advanced: End-User Connections
If you're building a product for others, your end-users can connect **their own accounts** at runtime — without ever touching Splox.
When an agent needs a tool the user hasn't connected yet, the Tool Router generates a **secure connect link** and surfaces it in the chat. The user clicks it, enters their credentials, and the agent continues — all without leaving the conversation.
This works automatically — no extra configuration needed.
***
## Frequently Asked Questions
Yes. Connect as many MCP servers as you like. Add multiple Tool nodes to your workflow — one per service, or use a single Tool node and let the Tool Router discover all connections automatically.
Yes. All credentials are AES-encrypted at rest and never exposed to the agent or LLM. The agent only sees the tool names and their schemas — not your API keys.
Yes. Any service that implements the MCP protocol can be connected. You can also self-host an MCP server and connect it via its URL in the Tools section.
You can connect any MCP-compatible server directly by entering its URL in the Tools section — it doesn't need to be listed in the marketplace.
***
## What's Next?
Build networks of specialized agents that collaborate on complex tasks
Build a support bot connected to your data sources
Run multiple agents simultaneously for faster results
Take your workflow live with webhooks and real users
 ## Prerequisites
 ***
## Step 4: Run It
1. Open the **Chat** panel
2. Ask your agent to do something that uses the connected service — e.g. `Send a message to my Telegram channel saying hello`
3. The agent will find the right tool, call it, and report back
***
## Step 4: Run It
1. Open the **Chat** panel
2. Ask your agent to do something that uses the connected service — e.g. `Send a message to my Telegram channel saying hello`
3. The agent will find the right tool, call it, and report back
 ***
## Advanced: End-User Connections
If you're building a product for others, your end-users can connect **their own accounts** at runtime — without ever touching Splox.
When an agent needs a tool the user hasn't connected yet, the Tool Router generates a **secure connect link** and surfaces it in the chat. The user clicks it, enters their credentials, and the agent continues — all without leaving the conversation.
This works automatically — no extra configuration needed.
***
## Frequently Asked Questions
***
## Advanced: End-User Connections
If you're building a product for others, your end-users can connect **their own accounts** at runtime — without ever touching Splox.
When an agent needs a tool the user hasn't connected yet, the Tool Router generates a **secure connect link** and surfaces it in the chat. The user clicks it, enters their credentials, and the agent continues — all without leaving the conversation.
This works automatically — no extra configuration needed.
***
## Frequently Asked Questions